There’s no better way to start your day off right than with an energizing morning yoga routine. Yoga is all about stretching and feeling in-tune with your body, which makes it the perfect way to wake up.
There are also many other benefits associated with yoga, such as:
- Better posture
- Helping you focus
- Improved flexibility
- Improved quality of sleep
- Strengthens Spine
Plus so much more. No wonder it’s a no-brainer to work yoga into your morning routine!
All you need is a carpet or yoga mat, some comfy clothes, and a few minutes and you’re ready to go.
BEGINNER YOGA ROUTINE POSES
There are a total of 8 different yoga poses that make up this quick 5 minute beginner yoga routine.
Here’s the routine:
- Standing Tadasana (0:30)
- Urdhva Hastasana (0:30-1:00)
- Forward Bend (1:00-1:30)
- Downward Dog (1:30-2:00)
- Child’s Pose (2:00-2:30)
- Cat-Cow Pose (2:30-3:00)
- Seated Spinal Twist (3:00-4:00)
- Savasana (4:00-5:00)
These times are not set in stone, as yoga heavily relies on taking deep breaths to really get into the pose.
However, this quick little beginner morning yoga routine should take only 5 minutes. If you really want to hold these poses, though, you can easily make this a longer yoga session!
Mountain Pose (Standing Tadasana)
The Standing Tadasana, also known as Mountain Pose, is a very basic yoga pose suitable for all, making it the first pose of this beginner yoga routine.
Often times, it makes as a great starting position or rest position in between poses. This is basically the same thing as standing, except in a more in-touch-with-your-body kind of way.
Some benefits of the Standing Tadasana include:
- Helps align your spine
- Helps you distribute your weight evenly
- Improved balance
- Improved posture
Step 1
Standing with your feet together and firmly planted on the ground, engage your thighs and tilt your tailbone down.
Step 2
With your arms by your side, face your palms forward and really stretch your arms down.
Step 3
Keeping your chin parallel to the mat, draw your shoulder blades down your back.
Hold this pose for 3-5 breaths (30 seconds). Make sure you’re really concentrating on your breathing and clearing your mind.
Upward Salute (Urdhva Hastasana)
Urdhva Hastasana, also know as Upward Salute, is another simple yoga pose great for beginners. This pose really stretches your shoulders and arms and feels oh so good.
Step 1
Keep your feet planted securely on the ground and engage your abdominal muscles. From Mountain Pose, bring your arms out in front of you, shoulder width apart with your palms facing each other.
Step 2
Tuck your shoulder blades in. Inhale, and reach your arms up towards the ceiling. For a better stretch, rotate your triceps inwards.
Step 3
Bring your arms back down so that they are parallel in front of you. Then bring them back down to your sides.
Step 4
Repeat steps 1-3 for 30 seconds. Each repetition of this pose is equivalent to one breath.
Hold this pose for 3-5 breaths (30 seconds).
Forward Bend (Uttanasana)
The Forward Bend (Fold), also known as Uttanasana, will definitely wake you up. This move focuses on the hamstrings, which is the rear part of your thigh.
Step 1
Standing in Tadasana, make sure your feet are planted firmly on the ground and your abdominal muscles are engaged.
Exhale, and begin bending from the hips, not the waist, as you want to keep your back straight while bending over. Forward bends focus on lengthening the front torso.
Step 2
The further you bend, the more you’ll feel your hamstrings being stretched. Try and keep your legs fairly straight with a slight bend in them. Make sure not to lock your knees, as it may cause discomfort.
Bring your fingers or palms to the floor, either slightly beside you or in front of you. If you can’t reach, fold your arms over each other so you’re holding your elbows.
Step 3
Inhaling, lift your torso back to Tadasana. Repeat steps 1-3 for 30 seconds.
Hold this pose for 3-5 breaths (30 seconds).
Downward Dog
Downward Dog has several benefits that I think we all can get behind. Practicing this pose can result in stronger hands, wrists, lower back, hamstrings, and the Achilles tendon.
Step 1
Start on all fours with your palms and knees on the ground. Tuck your toes under your feet and lift your legs and hips up. In order to put less stress on your wrists, shift your weight to your legs.
Step 2
Step your feet out to the edge of your mat. Again, you want to push that weight off your hands and send it to your legs. By doing this, your back and arms will become straighter.
Step 3
Slowly lift one heel up off the mat while pushing the other to the floor. Alternate each foot every few seconds. You should feel a nice stretch in your hamstrings and calves.
Hold this pose for 3-5 breaths (30 seconds).
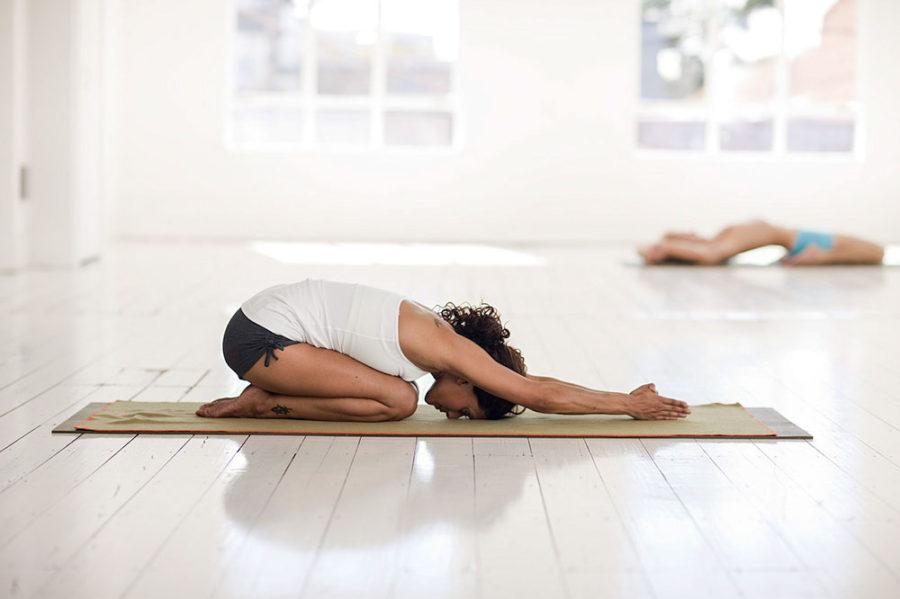
Child’s Pose
Child’s Pose focuses on stretching the ankles, back, hips, and thighs, while also reducing fatigue and stress. So whenever you’re looking for a nice stretch of these regions, give this pose a try.
Step 1
Still in Downward Dog, step your feet together and lower your knees to the floor. Tuck your toes, and rest your glutes on your feet.
Step 2
Press your chest against your quadriceps and stretch your arms out in front of you. Hold this pose for 2 breaths.
Step 3
Now reach your arms to the left, keeping your chest pressed against your quads. You should feel a nice stretch in your right side. Hold this pose for 2 breaths.
Step 4
Now reach your arms to the right, keeping the same position as before. Now you should feel your right side being stretched. Hold this pose for 2 breaths.
Cat-Cow Pose
The Cat-Cow Pose is a combination of the Cat Pose and the Cow Pose. The difference between the two is the arch of your back.
In the Cow Pose, the back is arched in the shape of a half-moon whereas the Cat Pose requires the back to be arched the opposite way. These are grouped together to make the perfect spinal warmup.
Step 1
From Child’s Pose, bring yourself back up onto your hands and knees. Position your hands and wrists directly under your shoulders and your knees directly under your hips.
Step 2
Inhale, dropping your stomach towards the mat. Lift your neck and chin so you are looking towards the ceiling, making sure not to strain your neck. You are now in Cow Pose.
Step 3
Exhale, pulling your belly button towards your spine, rounding your back toward the ceiling. Face your head towards the ground but don’t bring your chin to your chest.
Step 4
Repeat steps 2-3 for 30 seconds.
Hold this pose for 3-5 breaths (30 seconds).
Seated Spinal Twist
Seated Spinal Twist, also known as Half Lord of the Fishes (talk about a silly name), has several benefits, such as enhancing digestion and energizing the spine. It also focuses on stretching your back, hips, neck, and shoulders.
When performing this yoga pose, it’s important to lengthen your spine before starting and while holding it to risk injury.
Step 1
Begin sitting with your legs stretched out in front of you. Bending your knees, bring your left foot under your right leg up towards your butt. Your left leg should be resting on the ground.
Step 2
Pull your right leg over the left, plating your right foot on the ground as close your left hip as possible.
Step 3
Move your right hand behind your, cross your left arm over your right leg, and turn your upper body to face behind you. With each inhale, draw your belly towards your spine. On each exhale, turn around even more.
Hold this pose for 3-5 breaths (30 seconds).
Step 4
Repeat steps 1-3 on your other side.
Hold this pose for 3-5 breaths (30 seconds) each side (1 minute total).
Corpse Pose (Savasana)
Savasana, also known as Corpse Pose, is generally a pose reserved for the end of a yoga session, as it’s a resting pose. This is the final pose of this beginner yoga routine.
When performing this, make sure to relieve any tension in your body. The purpose of Savasana is to allow your muscles worked during the routine to relax.
Step 1
Lay down on your back, allowing your arms, legs, and feet to relax on the ground. Allow your feet to fall to the side gently, while your arms lay at your side with your palms facing up.
Step 2
If there is a muscle that isn’t relaxed, focus on it while taking a deep breath, and exhale to release the tension on the muscle. Allow yourself to fully relax and relieve all tension.
Hold this pose for 6-8 breaths (1 minute).
And there you have it, an easy yet energizing beginner yoga routine!
You can do this as often as you’d like to help start your day off right or calm you down after a stressful day.